
Main Screen
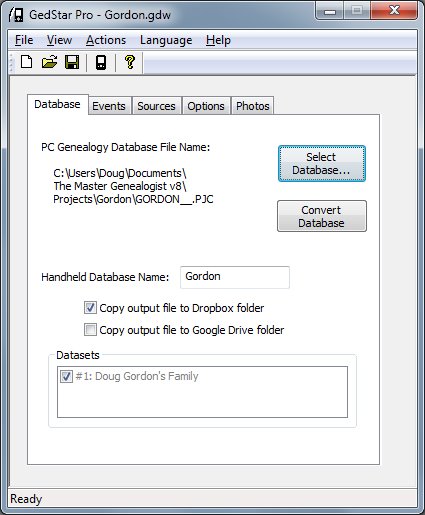
This is the main screen for selecting and initiating the conversion of your genealogy data to an Android database file.
- Select Database - This brings up a standard Windows browse dialog. Select your database type from the Files of Type dropdown and then locate and select your genealogy file.
- Handheld Database Name - This is the name used to create the Android file and will also identify the database on your device. For example, the name shown above will result in an Android database file named Gordon.gedstar.
- Copy output to Dropbox folder - If you are using the (recommended!) method of using Dropbox to transfer your database file, then checking this box makes it even easier as the output file from the conversion will be copied to your Dropbox folder for an "automatic sync" with your Android device.
- Copy output to Google Drive folder - If you are using the (alternate recommended) method of using Google Drive to transfer your database file, then checking this box tells GedStar Pro to copy the output file directly to your Google Drive folder for an "automatic sync" with your Android device.
- Convert Database - Click this when your database is selected and all your options have been set (see the pages for the other setting tabs).
The file new/open/save icons in the toolbar refer to a settings file that the conversion program can create so that your settings are saved for the next time you run the conversion. In the above example, the conversion settings have been saved in a file named Gordon.gdw. This also allows you to have separate settings for multiple genealogy files that you might have.